

Introduction
Web3 has revolutionized how we interact with decentralized applications (dApps), and communication is a crucial aspect of enhancing user experience. In this blog post, we'll guide you through creating a Web3 chat app in just one day, leveraging the power of Push Protocol. Push Protocol is a web3 communication network that facilitates cross-chain notifications and messaging for dApps, wallets, and services.

We'll use a powerful tech stack including Next.js for front-end development, Tailwind CSS for styling, the Push Protocol SDK for communication, React Redux for state management, and Wagmi for wallet integration. Let's dive in!
Deployment & Repo
The website is live at https://quick3-messenger.vercel.app/
Check the repository out on Github: https://github.com/AnoyRC/quick3-messenger
Drop a Star and follow to connect!
Check the Docs for a more detailed walkthrough: https://push.org/docs/
Prerequisites
Before we start, make sure you have Node.js and npm installed on your machine.
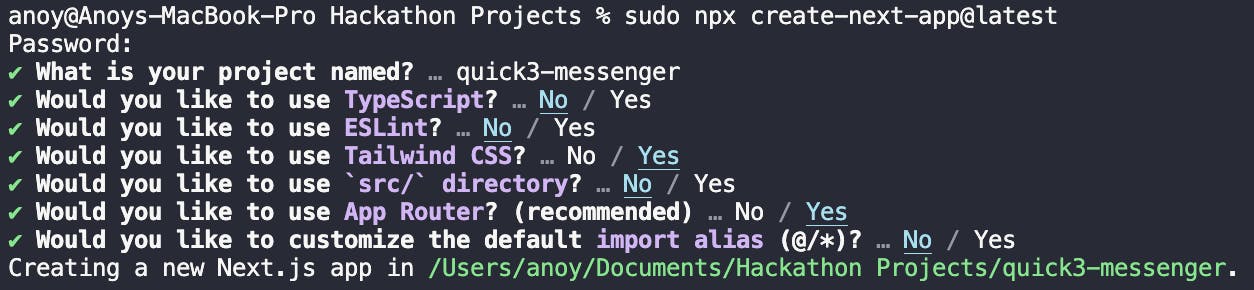
Step 1: Set Up Your Next.js App
Create a new Next.js app using the following command:
npx create-next-app@latest
My Configuration :
Step 2: Install Dependencies
Install the required packages for Push Protocol, React Redux, Wagmi, and Tailwind CSS:
npm i @pushprotocol/restapi @reduxjs/toolkit react-redux ethers@5.7 viem@1.19.13 wagmi@1.4.10 boring-avatars @material-tailwind/react @heroicons/react
@heroicons/react for Icons
@material-tailwind/react for UI Components
boring-avatars for Generating avatars based on the address of the user
We are using a specific version of ethers@5.7 viem@1.19.13 and wagmi@1.4.10 . (I consider them the best version for the development of web3 Dapps)
Setting up React-Redux and Toolkit
Creating a store and a slice
Create a folder and name it redux. Inside that create a store.js file.
"use client";

import { configureStore } from "@reduxjs/toolkit";
import pushSlice from "@/redux/slice/pushSlice";

export const store = configureStore({
  reducer: {
    push: pushSlice,
  },

  middleware: (getDefaultMiddleware) =>
    getDefaultMiddleware({
      serializableCheck: false,
    }),
});
Now, you will notice there is an unknown file import named pushSlice. Let's make that.
Create a folder and name it slice. Inside that create a pushSlice.js file.
import { createSlice } from "@reduxjs/toolkit";

const pushSlice = createSlice({
  name: "push",

  initialState: {
    user: null,
    chats: null,
    requests: null,
    stream: null,
    data: null,
    addDialog: false,
  },

  reducers: {
    setUser: (state, action) => {
      state.user = action.payload;
    },
    setChats: (state, action) => {
      state.chats = action.payload;
    },
    setRequests: (state, action) => {
      state.requests = action.payload;
    },
    setStream: (state, action) => {
      state.stream = action.payload;
    },
    setData: (state, action) => {
      state.data = action.payload;
    },
    handleAddDialog: (state, action) => {
      state.addDialog = !state.addDialog;
    },
  },
});

export const {
  setUser,
  setChats,
  setRequests,
  setStream,
  setData,
  handleAddDialog,
} = pushSlice.actions;

export default pushSlice.reducer;
These are global states that would be needed later on. For now, let's keep the variables and function names that way.
Creating a provider
As Nextjs runs both on the server side and the client side. We need to specify if we need to use the client or not. And for using Redux and its toolkit, we need all the files working on the client side.
Go to the root folder. Create a new folder and name it providers. Inside that create a reduxProvider.js file.
"use client";

import { store } from "@/redux/store";
import { Provider } from "react-redux";

export const ReduxProvider = ({ children }) => {
  return <Provider store={store}>{children}</Provider>;
};

export default ReduxProvider;
And lastly, let's add that inside our layout.js file located inside our app folder.
import { Poppins } from "next/font/google";
import "./globals.css";
import ReduxProvider from "@/providers/reduxProvider";

const poppins = Poppins({
  subsets: ["latin"],
  weight: ["200", "300", "400", "500", "600", "700", "800", "900"],
});

export const metadata = {
  title: "Create Next App",
  description: "Generated by create next app",
};

export default function RootLayout({ children }) {
  return (
    <html lang="en">
      <body className={poppins.className}>
        <ReduxProvider>
          {children}
        </ReduxProvider>
      </body>
    </html>
  );
}
Congratulations !! You have successfully integrated react-redux in our app.

Setting Up Wagmi
Creating a Provider
For this guide, we would only connect to Metamask and Coinbase Wallet. Open the providers folder that we created earlier. Create a wagmiProvider.js file.
"use client";
import { WagmiConfig, createConfig, configureChains, mainnet } from "wagmi";
import { publicProvider } from "wagmi/providers/public";
import { MetaMaskConnector } from "wagmi/connectors/metaMask";
import { CoinbaseWalletConnector } from "wagmi/connectors/coinbaseWallet";

const { chains, publicClient, webSocketPublicClient } = configureChains(
  [mainnet],
  [publicProvider()]
);

const config = createConfig({
  autoConnect: true,
  connectors: [
    new MetaMaskConnector({ chains }),
    new CoinbaseWalletConnector({
      chains,
      options: {
        appName: "wagmi",
      },
    }),
  ],
  publicClient,
  webSocketPublicClient,
});

export const WagmiProvider = ({ children }) => {
  return <WagmiConfig config={config}>{children}</WagmiConfig>;
};
Lastly, Add the provider to our layout.js file located inside our app folder.
import { Poppins } from "next/font/google";
import "./globals.css";
import { WagmiProvider } from "@/providers/wagmiProvider";
import ReduxProvider from "@/providers/reduxProvider";

const poppins = Poppins({
  subsets: ["latin"],
  weight: ["200", "300", "400", "500", "600", "700", "800", "900"],
});

export const metadata = {
  title: "Create Next App",
  description: "Generated by create next app",
};

export default function RootLayout({ children }) {
  return (
    <html lang="en">
      <body className={poppins.className}>
        <ReduxProvider>
          <WagmiProvider>{children}</WagmiProvider>
        </ReduxProvider>
      </body>
    </html>
  );
}
Congratulations !! Wagmi is ready to use. Let's connect some wallets. Shall we?

Frontend File Structure
Let's Make a simple file structure and UI for our client. After all, we need to complete it in 1 Day.
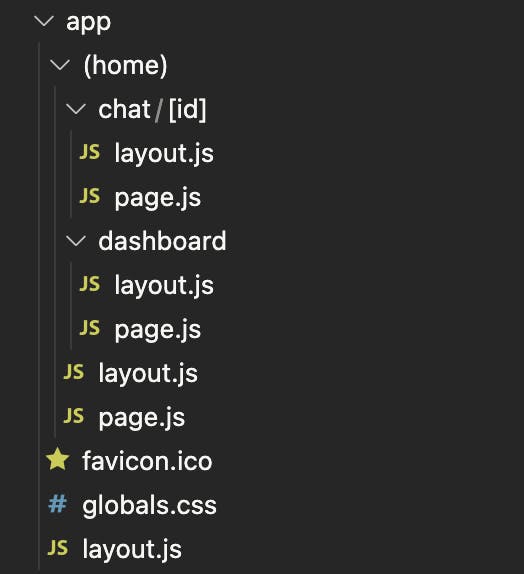
Routes
"/" - We have a home page where users will connect and initiate push protocol.
"/dashboard" - a dashboard to see all the chats and requests in one place.
"/chat/:id" - a chat window where the users can chat with each other.
UI
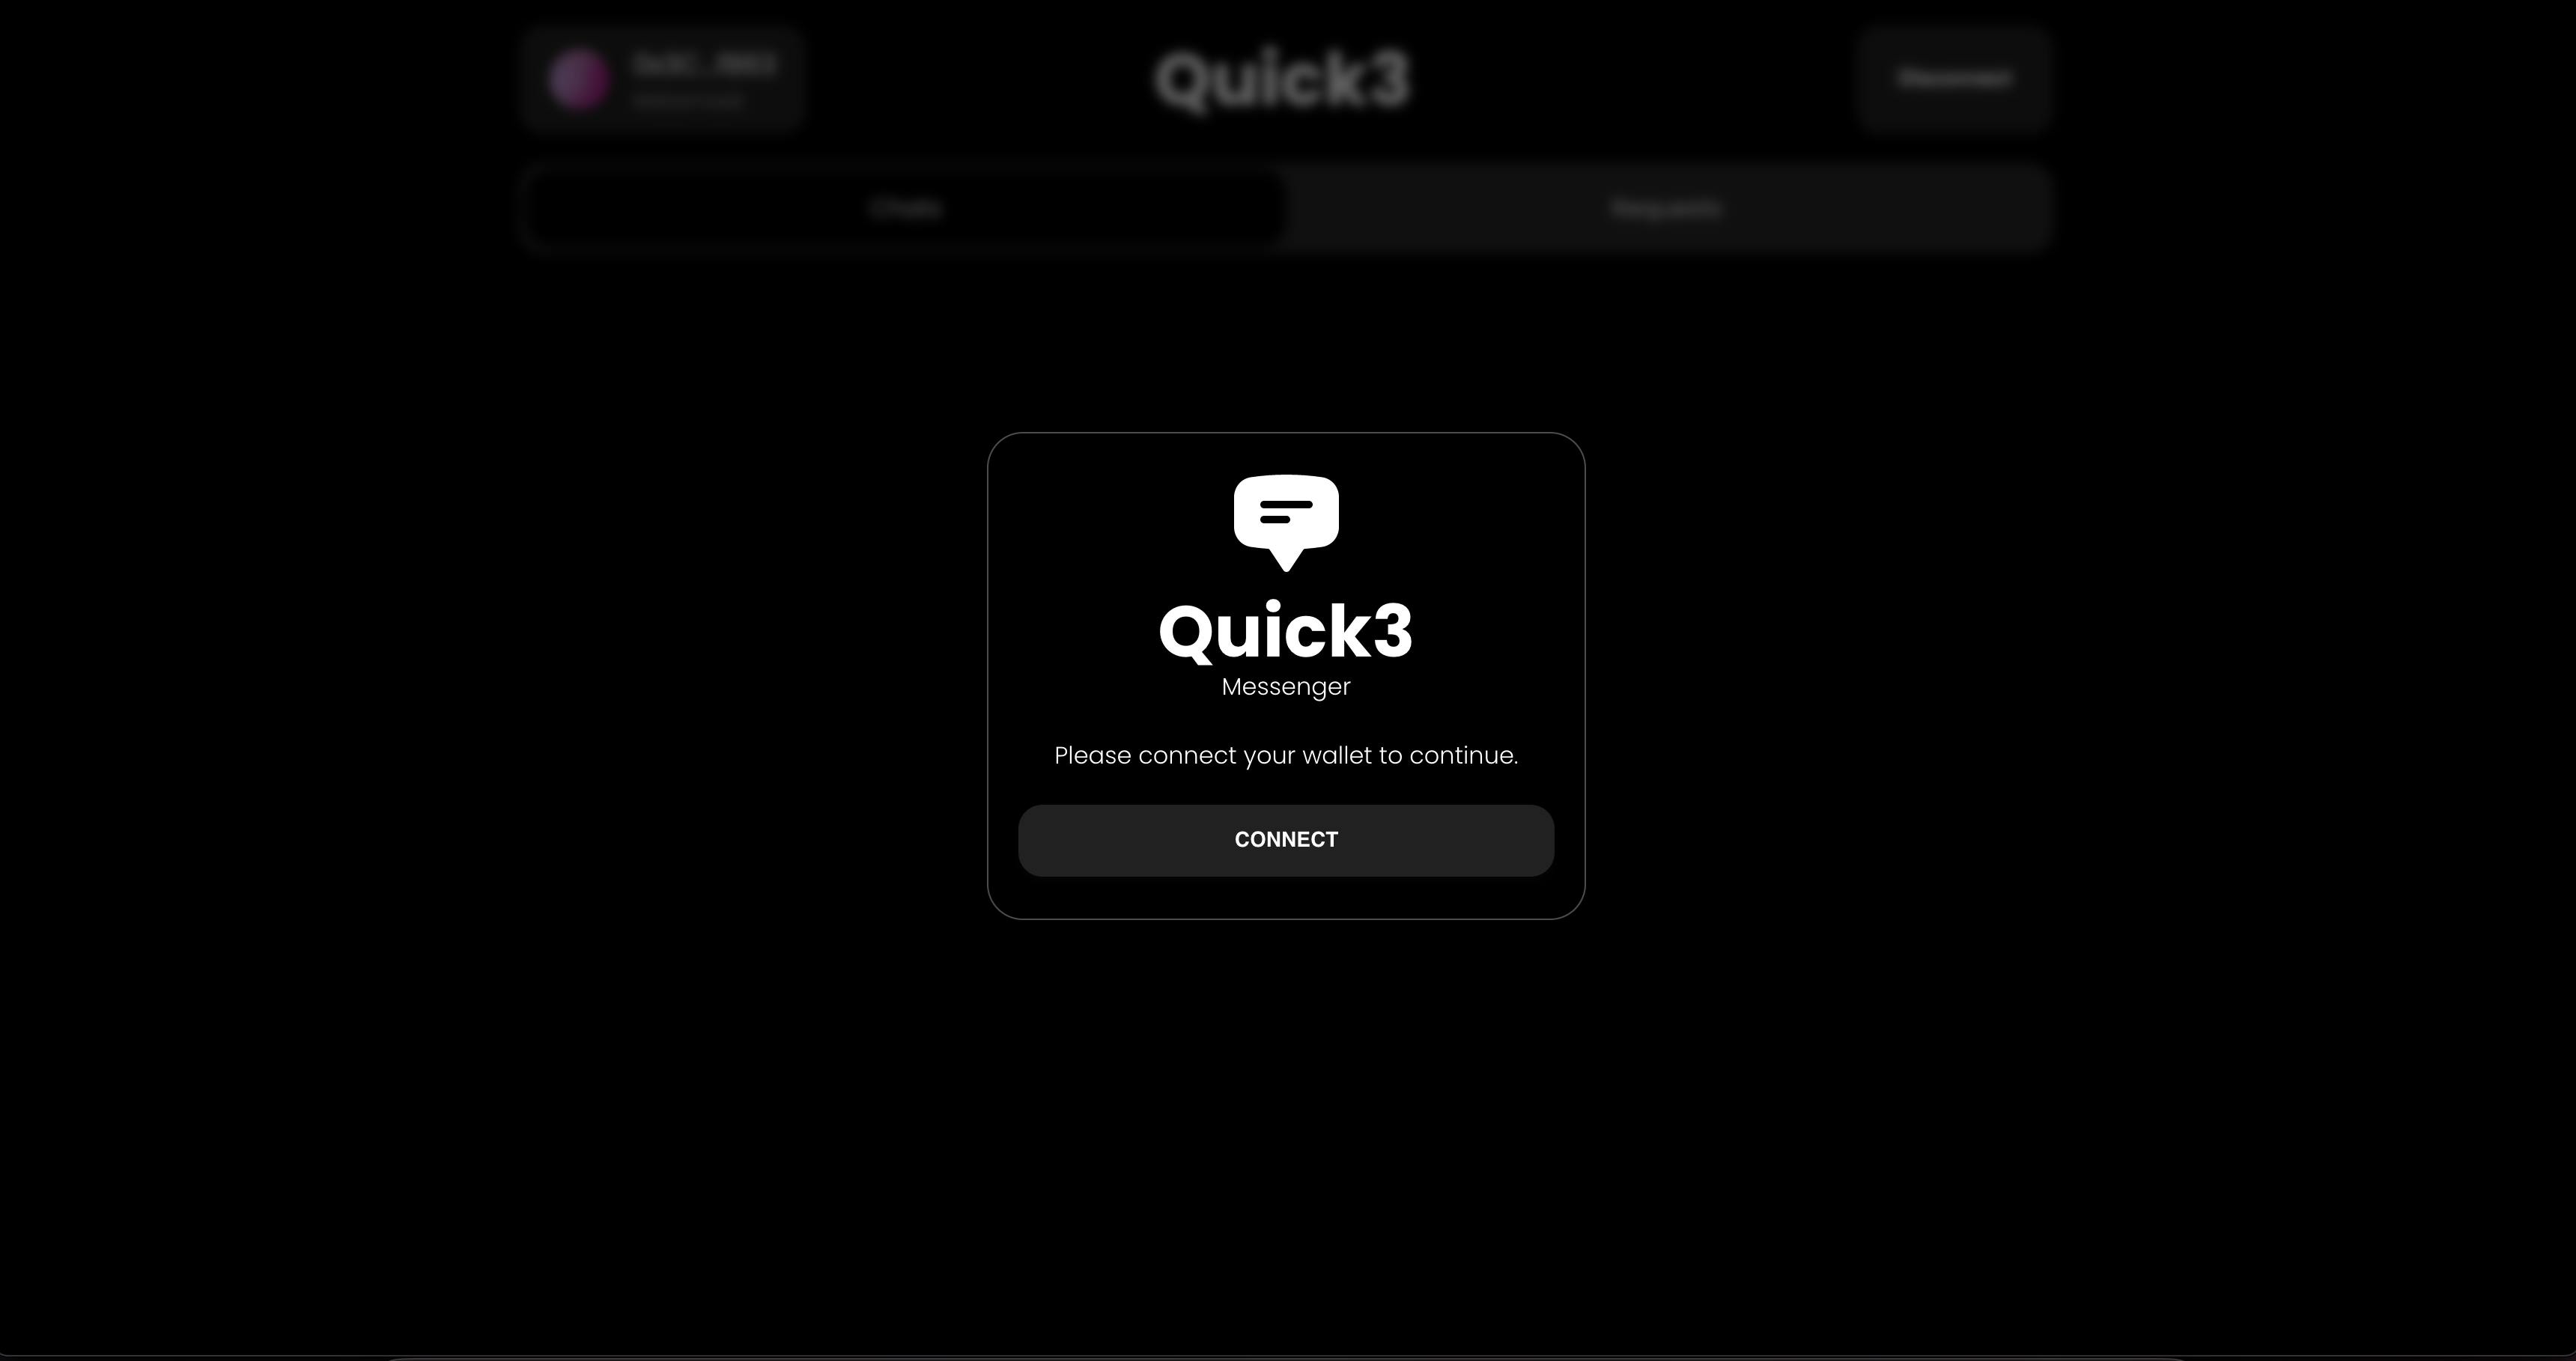
- Connect window in "/" route.

- Sign window in "/" route.

- All Chats in the "/dashboard" route
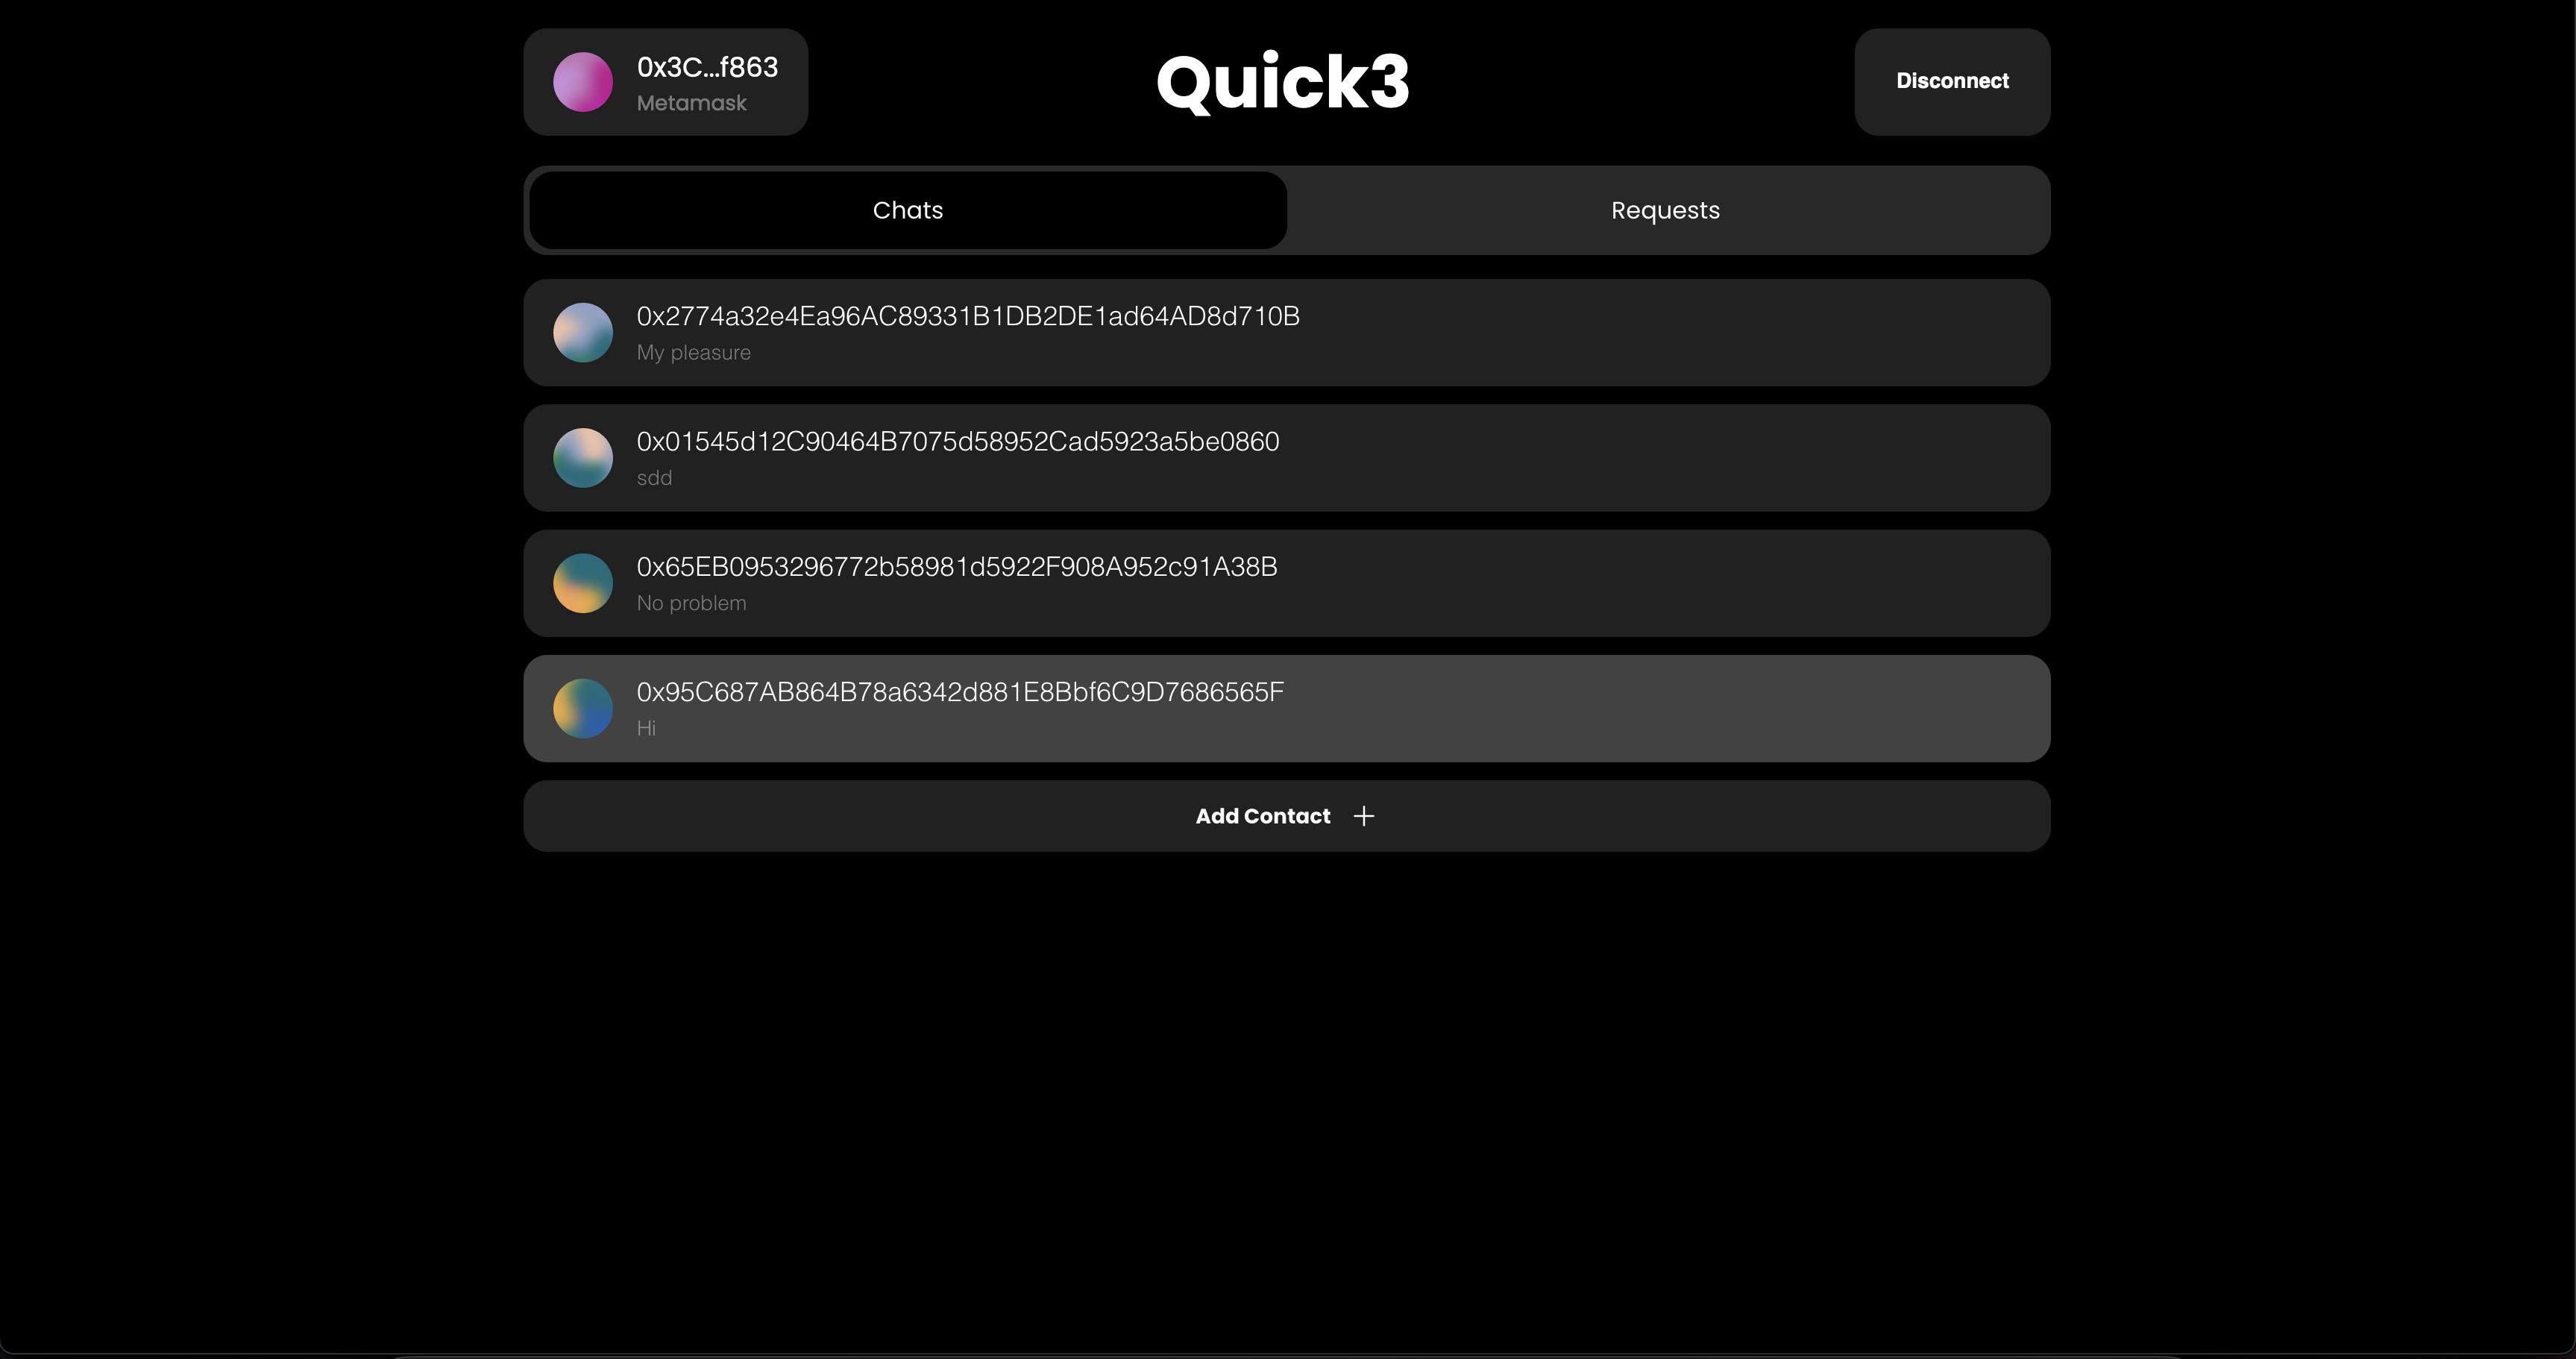
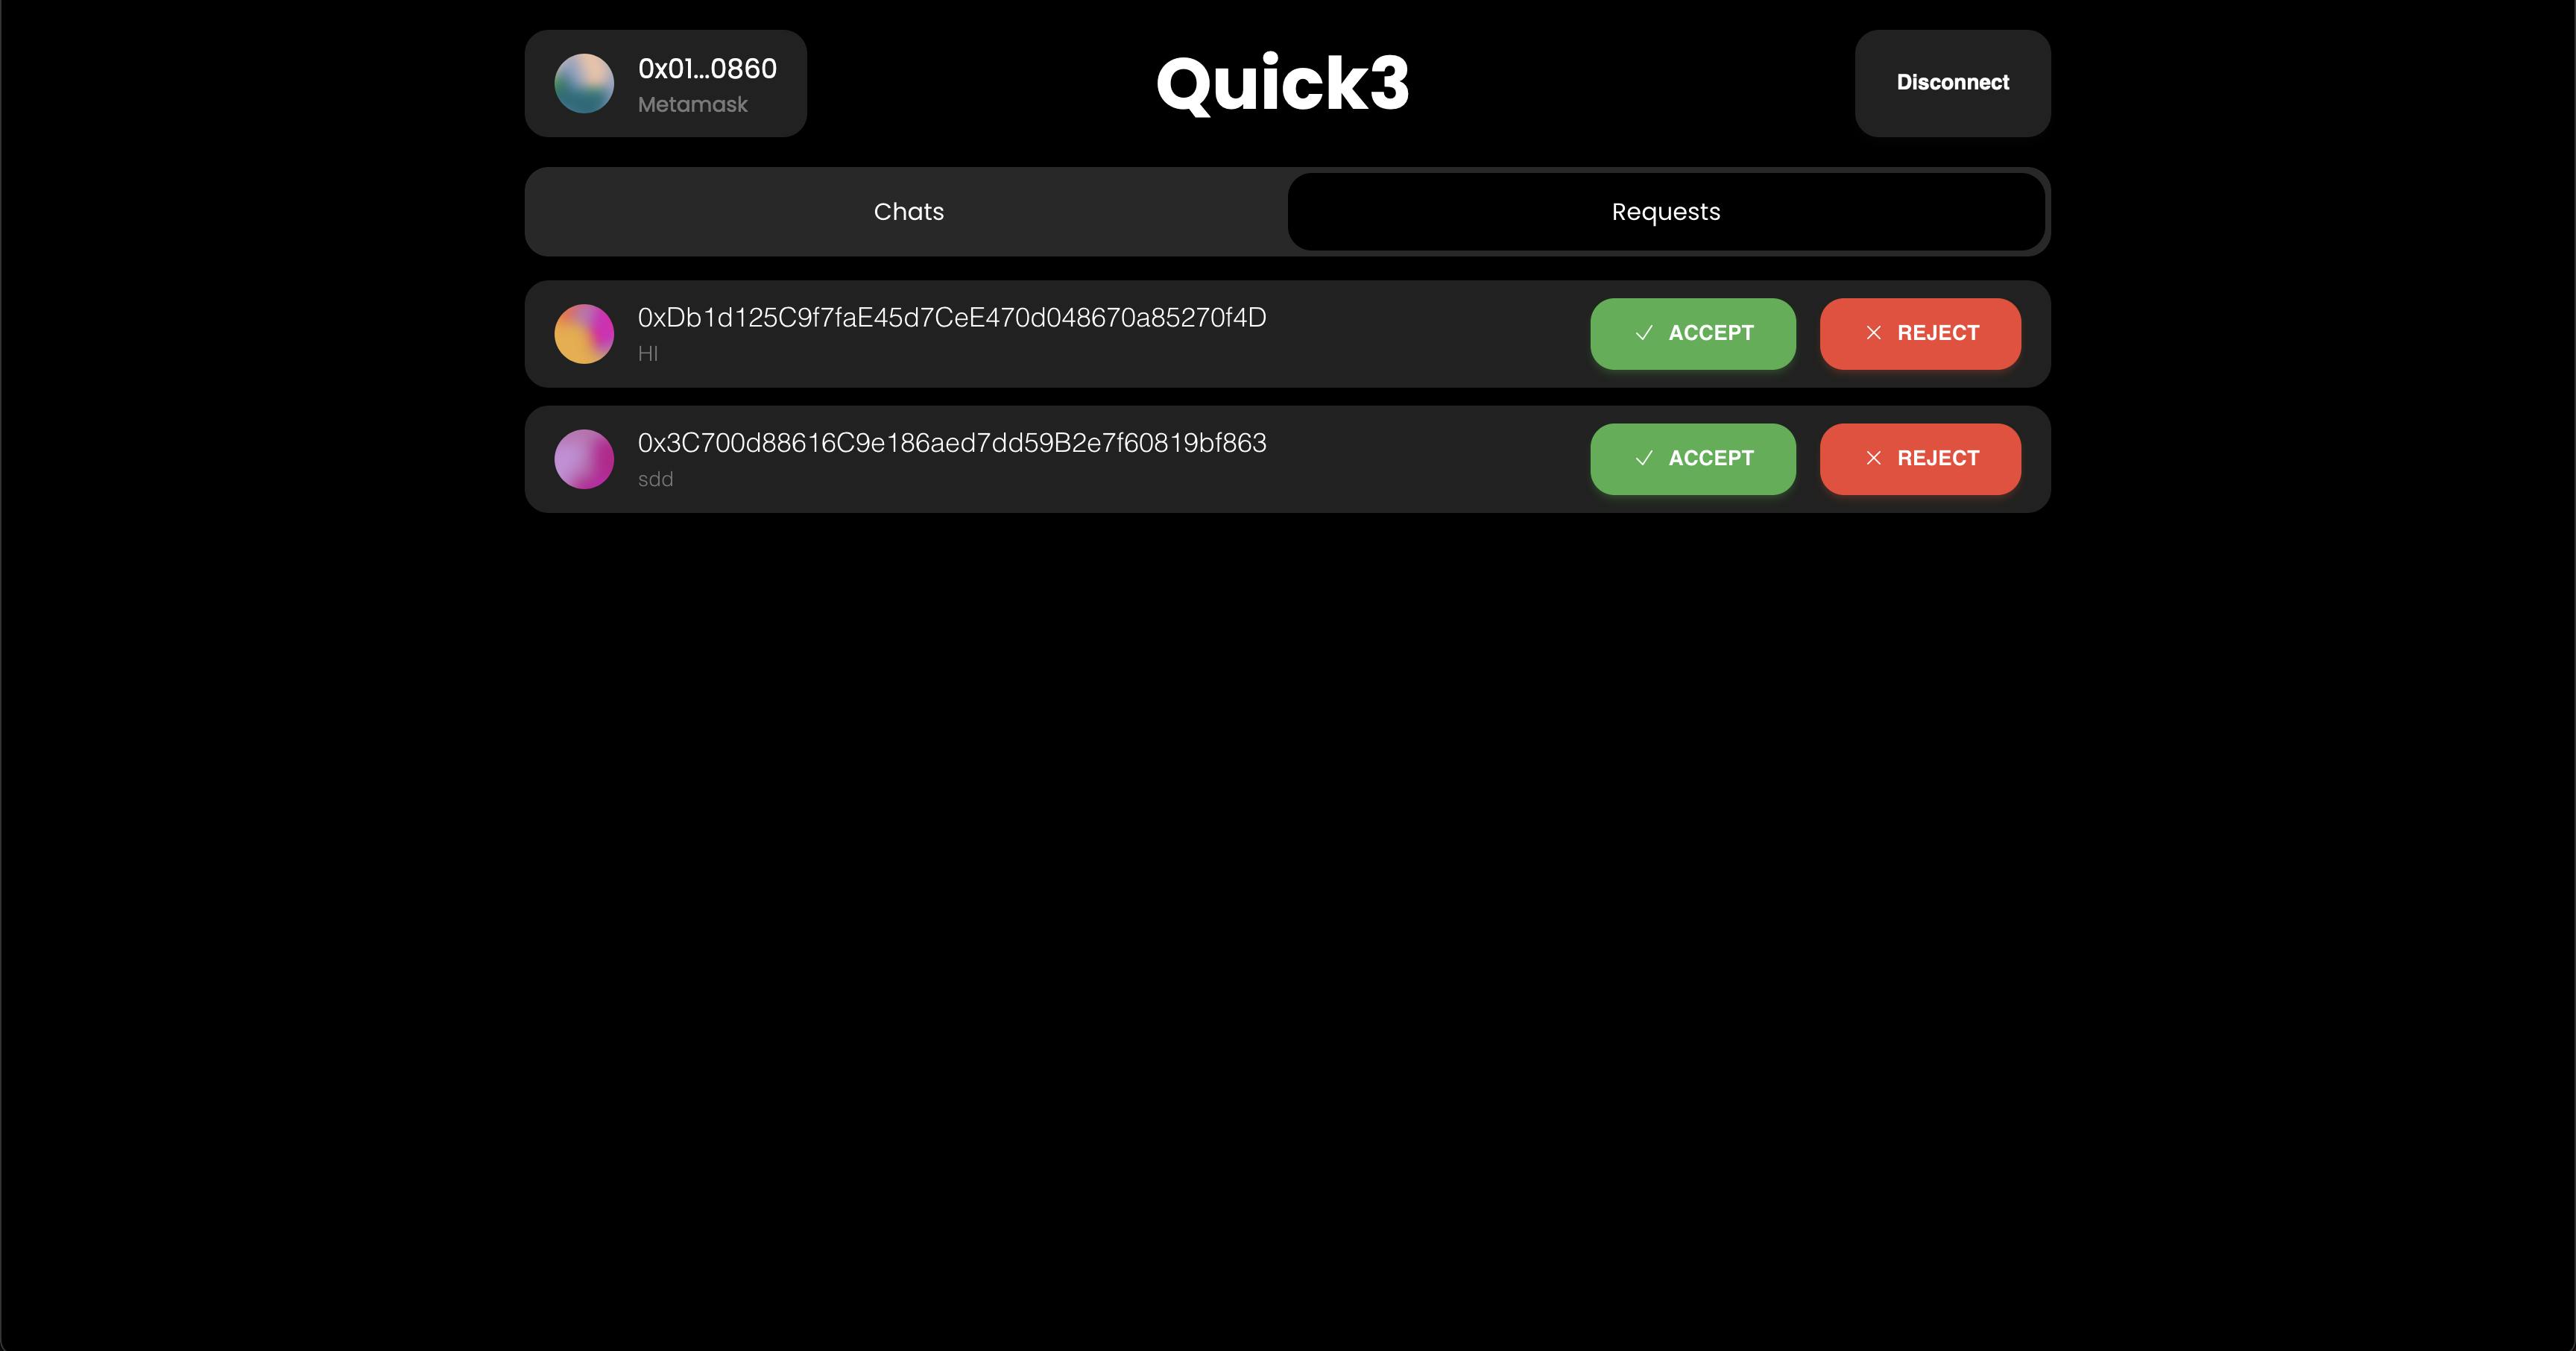
- All Chat Requests in the "/dashboard" route
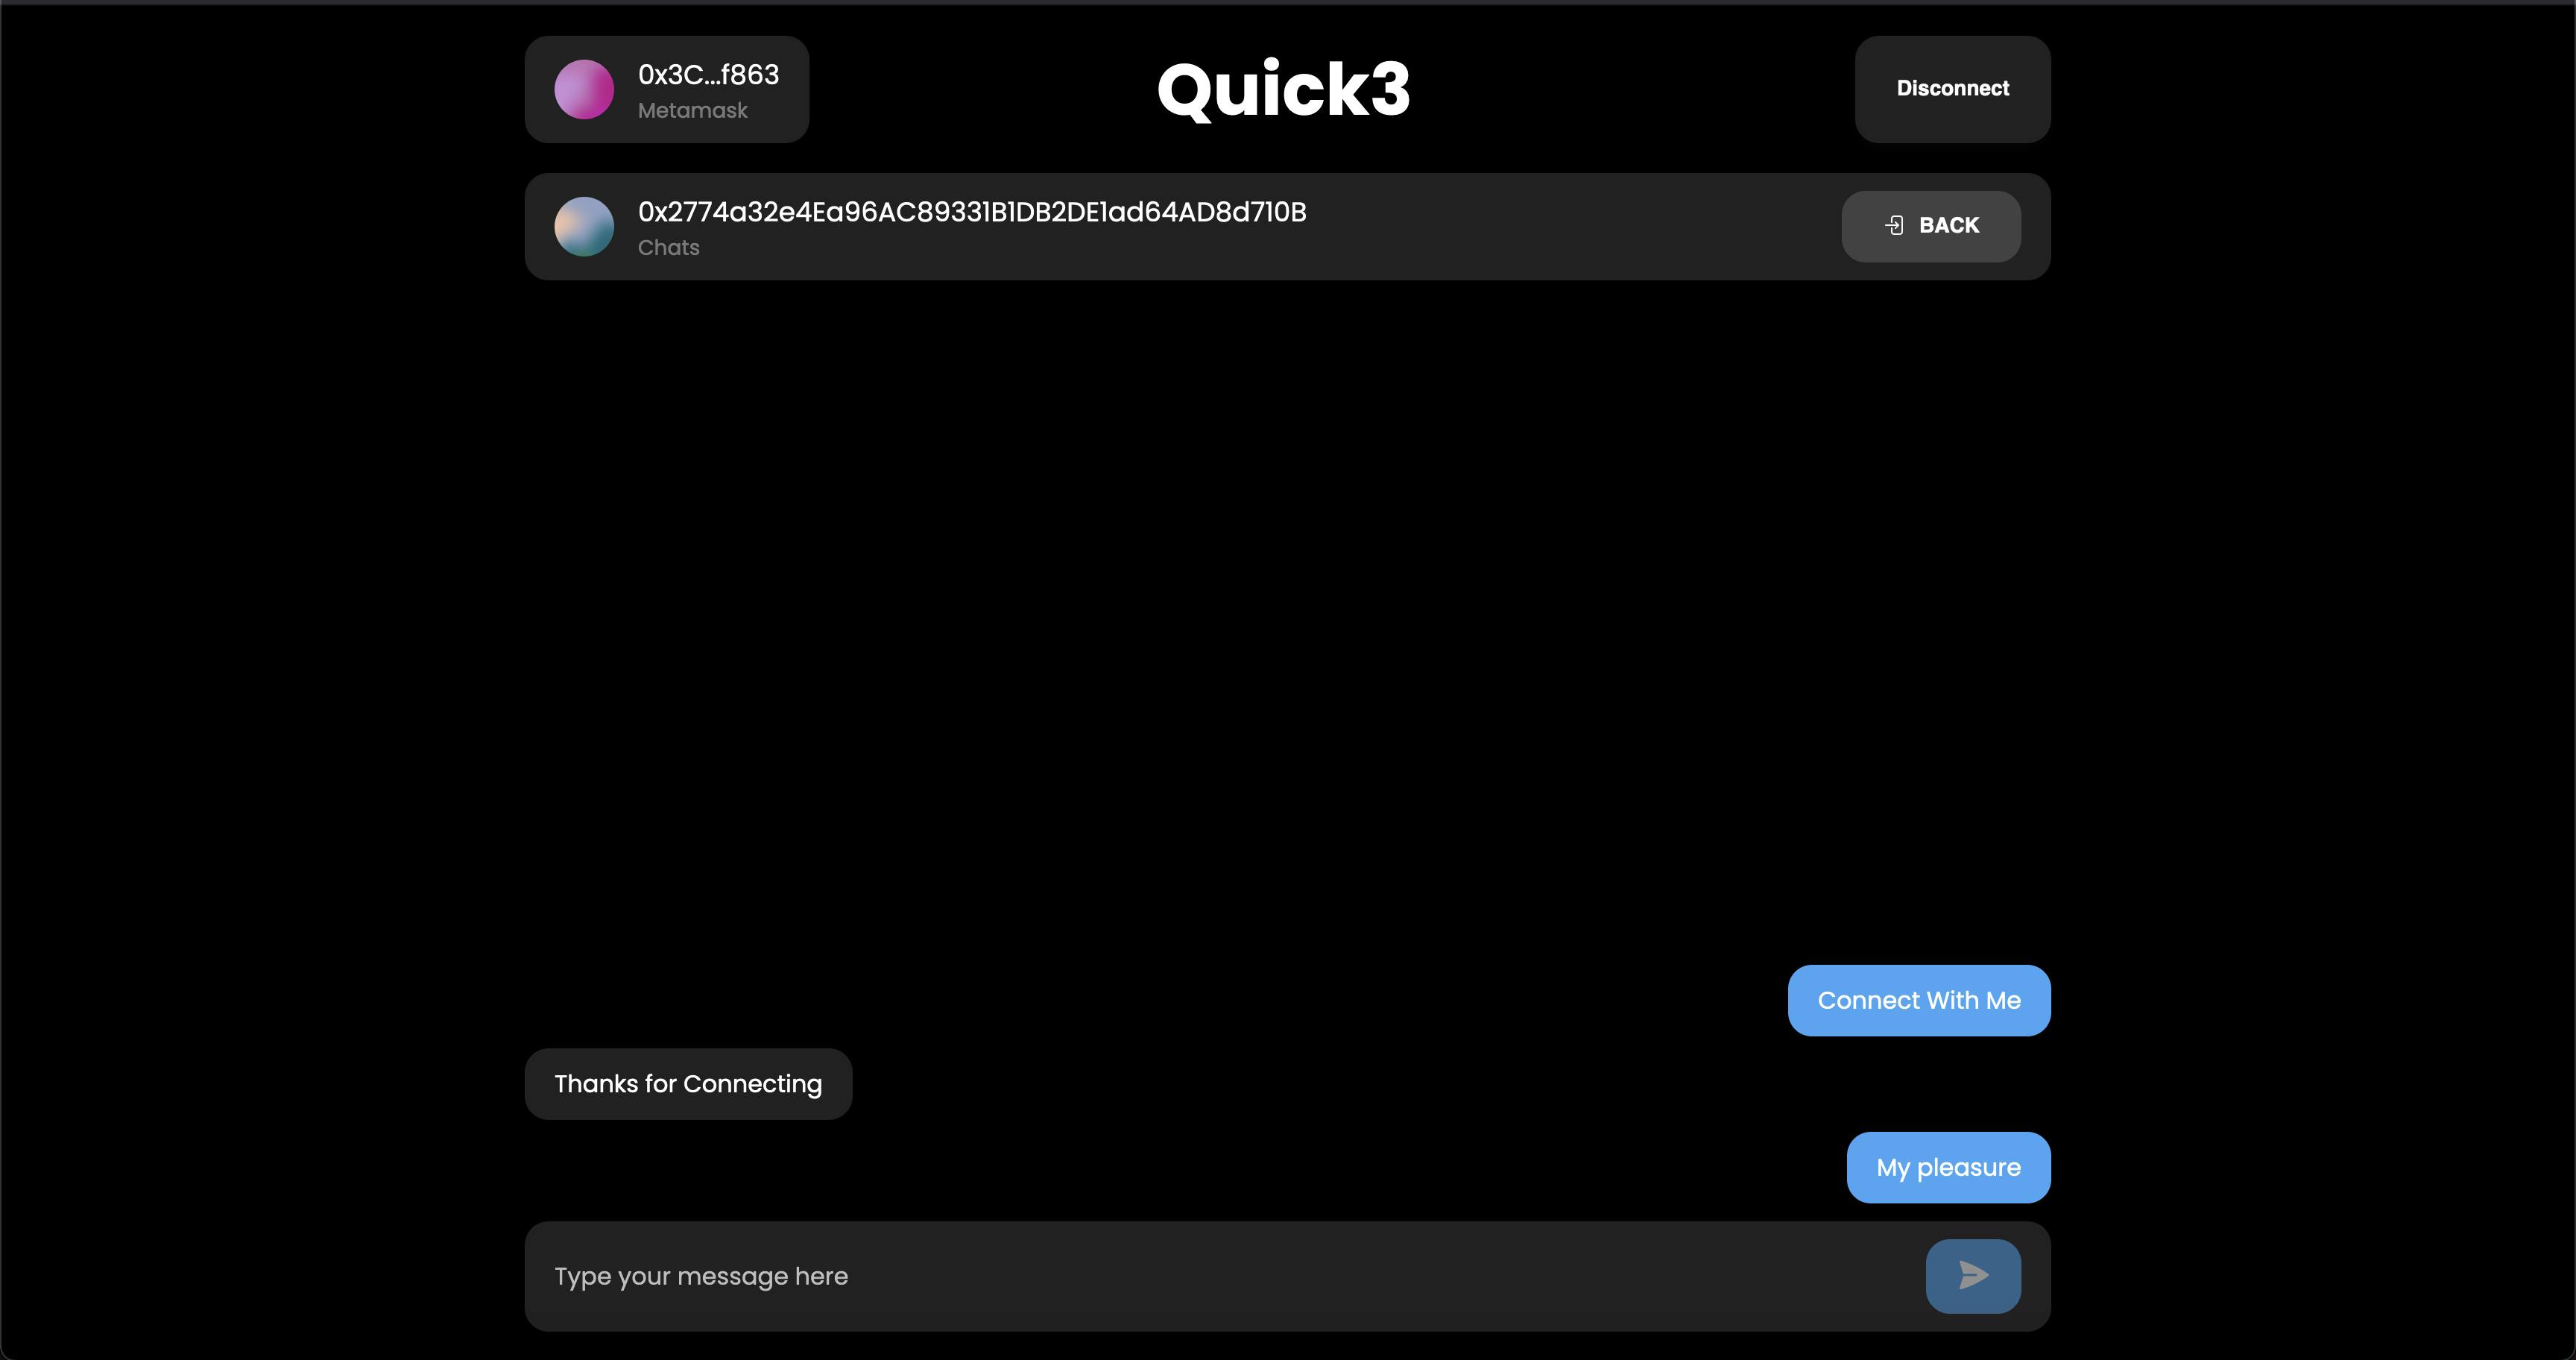
- Chat window in the "/chat/:id" route
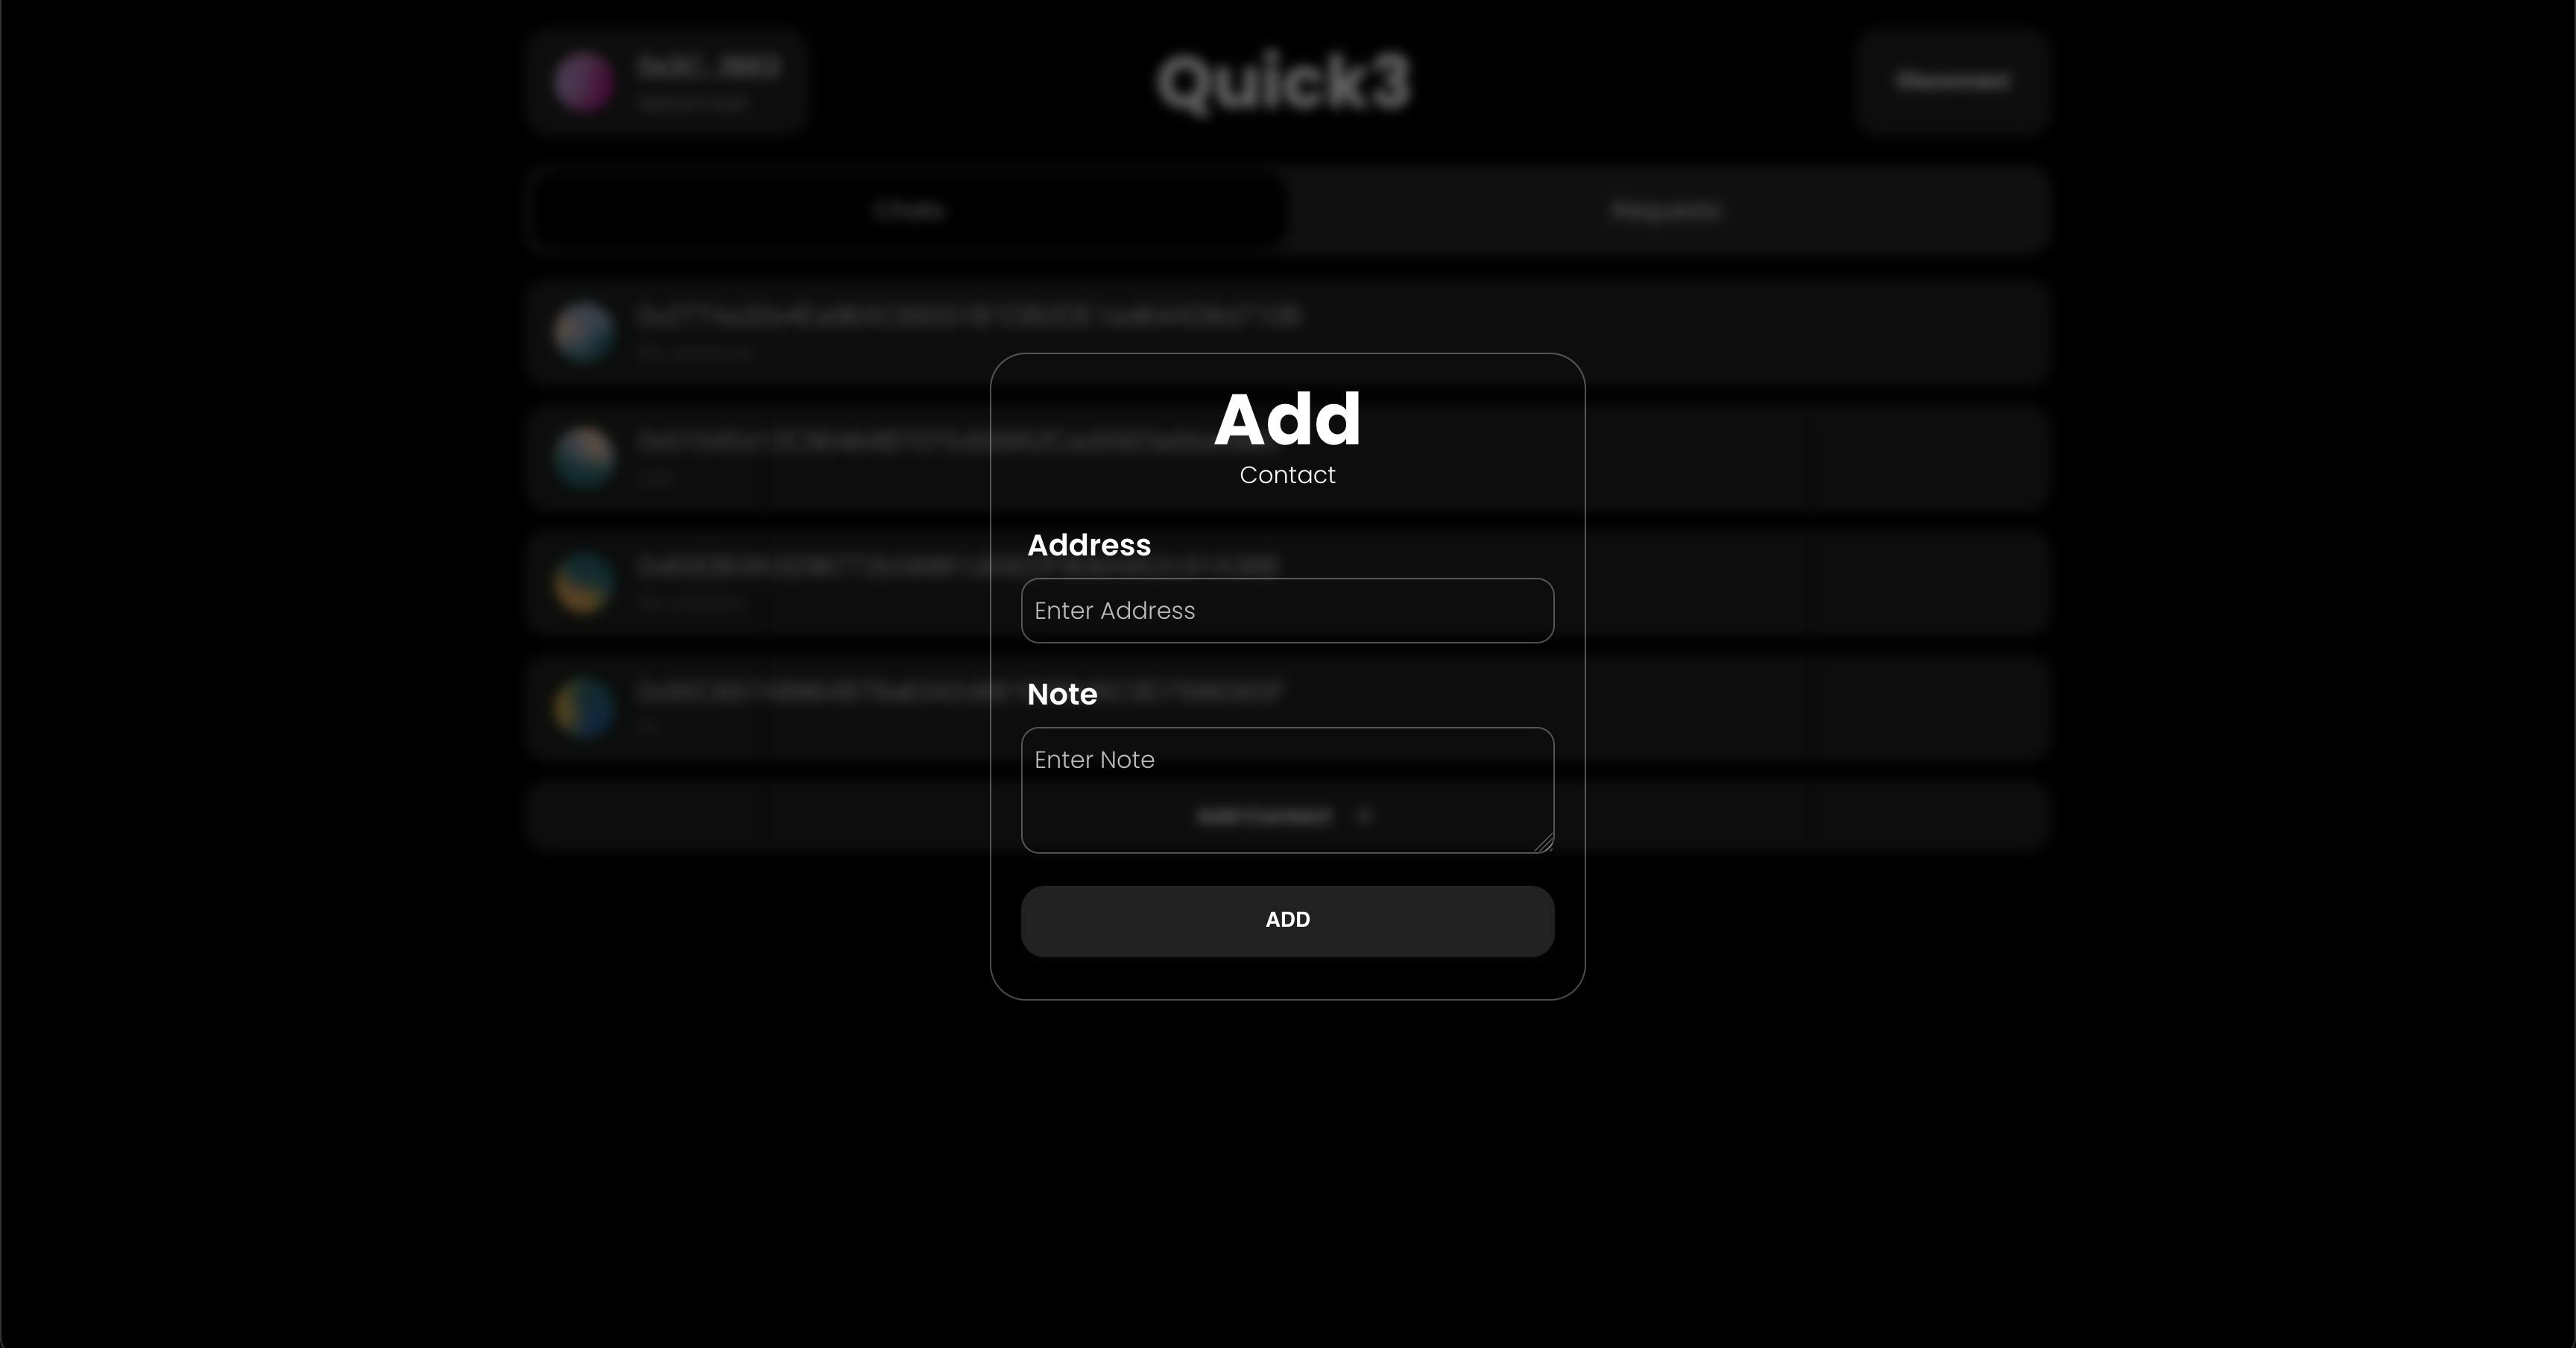
- Add Contact Dialog in the "/dashboard" route
- Fallback Handler on both "/dashboard" and "/chat/:id"
The UI is made using material tailwind, see the GitHub Repository for code.
Push Protocol Basics
Initialize Push
Source: Link
const user = await PushAPI.initialize(signer, {
    env: CONSTANTS.ENV.PROD,
});
Use initialize function immediately after connecting (using useEffect maybe) or assign this function to a button when the user has connected with their wallet.
The user will be needed for all other function calls, so store it in redux, so that we can globally access the object.
if (user) {
    if (!user.readMode) {
        dispatch(setUser(user));
        streamChat(user);
        router.push("/dashboard");
    }
}
Source: Link
Check for user.readMode as it checks if the user has signed or not.
Stream
Source: Link
const streamChat = async (user) => {
    const stream = await user.initStream(
      [CONSTANTS.STREAM.CHAT, CONSTANTS.STREAM.CHAT_OPS],
      {
        filter: {
          channels: ["*"],
          chats: ["*"],
        },
        connection: {
          retries: 3,
        },
        raw: false,
      }
    );

    //Check for Changes in Chat or others
    stream.on(CONSTANTS.STREAM.CHAT, (data) => {
      dispatch(setData(data));
    });

    //Check for Changes in Chat Operations
    stream.on(CONSTANTS.STREAM.CHAT_OPS, (data) => {
      dispatch(setData(data));
    });

    // Connect
    stream.connect();

    //Set Globally to Disconnect Later
    dispatch(setStream(stream));
  };
Stream checks for any chats, chat requests, or messages received from any user. Try to connect to the stream as soon as the user initializes push. So that you can get live updates of chats and chat requests.
Save the stream globally, so that you can disconnect the stream when the user has logged out. And store the data received from the stream to check for changes.
Source: Link
const stream = useSelector((state) => state.push.stream);

if (stream) {
    stream.disconnect();
}
Fetch Chats / Contacts
Source: Link
const fetchChats = async () => {
    const chat = await user.chat.list("CHATS");
    dispatch(setChats(chat));
};
Fetch Chats of the users you are already talking to. Use this function when loading into the dashboard to show the existing contacts
Fetch Chat Requests
Source: Link
const fetchRequests = async () => {
    const requests = await user.chat.list("REQUESTS");
    dispatch(setRequests(requests));
};
The first Message from any user becomes a chat request. This feature is given to avoid spam from random users. Fetch Chat requests on the request tab of the dashboard.
Accept Chat Requests
Source: Link
const acceptRequest = async (walletAddress) => {
    await user.chat.accept(walletAddress);
    fetchChats();
    fetchRequests();
};
Accept Chat Requests received from the given wallet address. Use this function where you let the user accept chat requests from other unknown wallet addresses.
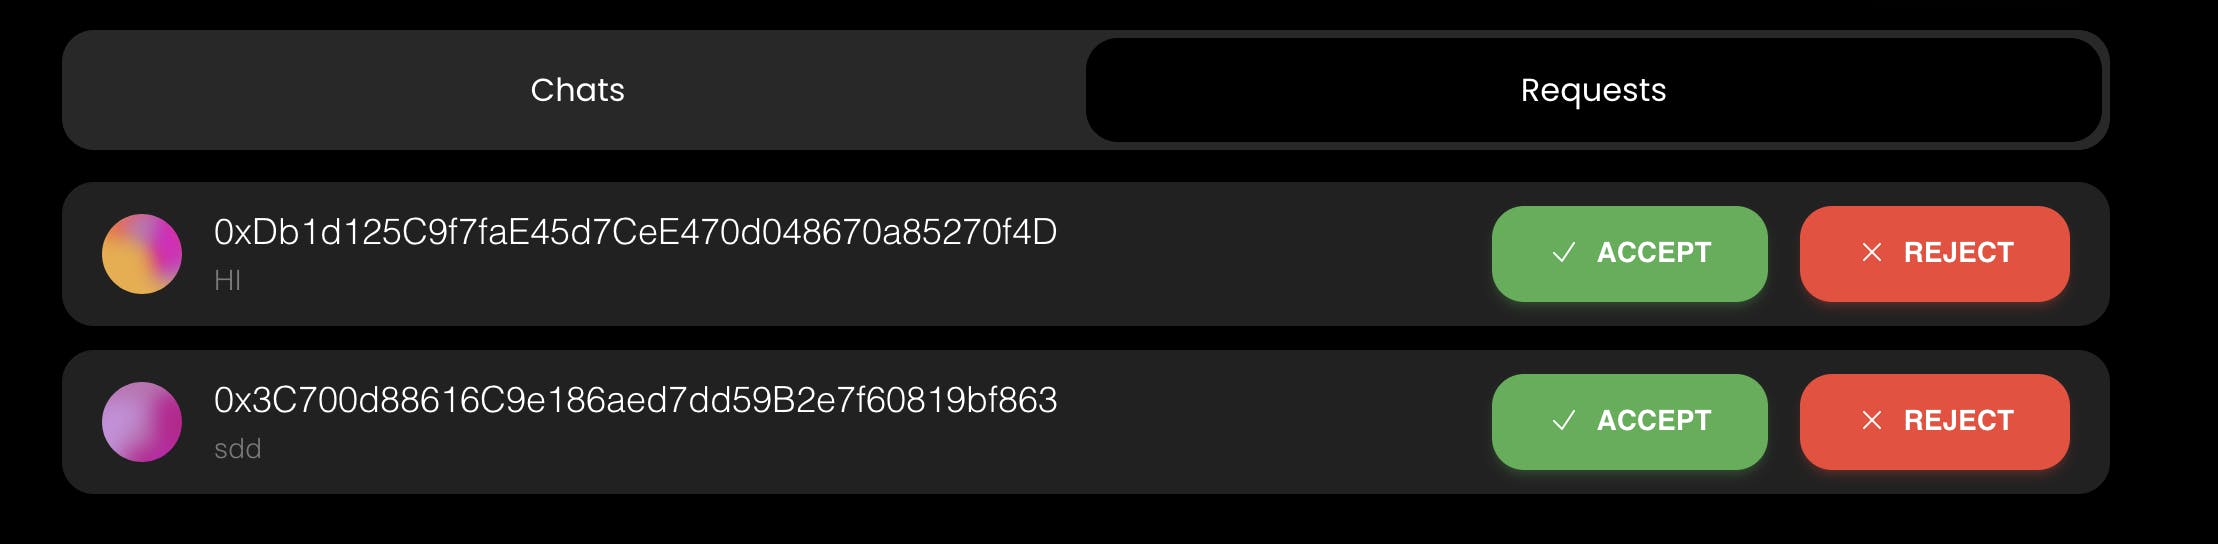
Reject Chat Requests
Source: Link
const rejectRequest = async (walletAddress) => {
    await user.chat.reject(walletAddress);
    fetchChats();
    fetchRequests();
};
Reject Chat Requests received from the given wallet address. Use this function where you let the user reject chat requests from other unknown wallet addresses.
Fetch Chat History
Source: Link
 const fetchHistory = async () => {
    const history = await user.chat.history(did);
    setHistory(history);
 };
Fetch Chat history based on the given did. Did can be found in the user object when you Fetch Chats / Contacts. Fetch Chat history when the user opens a particular chat to send a message.
Send Message
Source: Link
const sendMessage = async () => {
    await user.chat.send(did, {
      type: "Text",
      content: message,
    });
    setMessage("");
    fetchHistory();
};
Sends the message after taking input from the user. The message can be any type, for example, file, gif, image, or text. For this project, we are only sending text messages.
Conclusion
Test your Web3 chat app locally using npm run dev. Once satisfied, deploy it to your preferred hosting platform.
Congratulations! You've successfully built a Web3 chat app in just one day using Push Protocol, Next.js, Tailwind CSS, React Redux, and Wagmi. This app provides a seamless and decentralized communication experience for users in the Web3 ecosystem. Feel free to enhance and customize it based on your project requirements. Happy coding!