How to execute your first Gasless Transaction using LightLink's Enterprise Mode


Table of contents
- Introduction
- What is LightLink?
- Code and Resources
- Deploying a Smart Contract in LightLink Pegasus Testnet
- Verifying your contract in LightLink Pegasus Testnet explorer
- Whitelisting your contract to enable Enterprise Mode
- Execute a Gasless Transaction from Block Explorer
- Execute a Gasless Transaction through Ethers.js
- Useful Links
Introduction
In this guide, we will learn how to deploy a smart contract in Lightlink's Pegasus Testnet, enable Lightlink's Enterprise Mode for that particular contract, and Execute our first gasless transaction. In the fast-paced world of decentralized applications (dApps) and blockchain technology, gas fees have long been a barrier to entry for many users. However, with the advent of LightLink's Enterprise Mode, accessing the benefits of blockchain technology without the hassle of gas fees is now a reality. In this guide, we'll walk you through the steps of making your first gasless transaction using LightLink's innovative solution.

What is LightLink?
LightLink is an Ethereum Layer 2 blockchain solution that addresses the scalability and usability challenges of decentralized applications (dApps) and blockchain users. It enables gasless transactions, providing instant and cost-effective interactions for enterprises, developers, and millions of users.
Understanding LightLink's Enterprise Mode
LightLink's Enterprise Mode is built on Ethereum Layer 2, offering users instant, gasless transactions. It operates by allowing developers to activate a contract address whitelist, enabling gasless transactions directly from users' Metamask wallets without any additional steps required. Developers pay a monthly subscription to subsidize gas fees for whitelisted dApp users, while users enjoy seamless interactions without fees.
Code and Resources
Fork the Github repo: https://github.com/AnoyRC/LightLink-Hardhat-Boilerplate
Deploying a Smart Contract in LightLink Pegasus Testnet
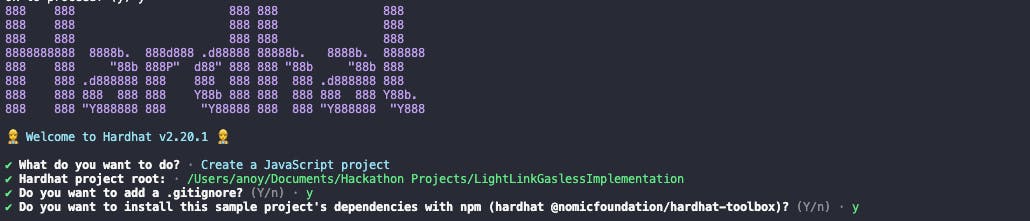
Let's set up a hardhat project to compile and deploy our Solidity Contract. Create a new hardhat project with the following command:
npx hardhat init
Let's write a simple counter contract in Solidity.
// SPDX-License-Identifier: MIT
pragma solidity ^0.8.24;

contract Counter {
    int private count = 0;
    function incrementCounter() public {
        count += 1;
    }
    function decrementCounter() public {
        count -= 1;
    }

    function getCount() public view returns (int) {
        return count;
    }
}
Compile the contract using the following command:
npx hardhat compile
After successful compilation, we need to add Lightlink's Pegasus Testnet to our hardhat.config.js file.
Edit the hardhat.config.js file with the following code:
require("@nomicfoundation/hardhat-toolbox");

const PRIVATE_KEY = "YOUR PEGASUS PRIVATE KEY";

/** @type import('hardhat/config').HardhatUserConfig */
module.exports = {
  solidity: "0.8.24",
  networks: {
    pegasus: {
      url: `https://replicator.pegasus.lightlink.io/rpc/v1`,
      accounts: [PRIVATE_KEY],
    },
  },
};
Also, deploy.js file with the following code to set up deployment.
const hre = require("hardhat");

async function main() {
  const [deployer] = await hre.ethers.getSigners();

  console.log("Deploying contracts with the account:", deployer.address);

  const counter = await hre.ethers.deployContract("Counter");

  console.log("Contract address:", await counter.getAddress());
}

main().catch((error) => {
  console.error(error);
  process.exitCode = 1;
});
Finally, to deploy the contract, execute the following command in the terminal:
npx hardhat run scripts/deploy.js --network pegasus
Verifying your contract in LightLink Pegasus Testnet explorer
We need to modify our hardhat.config.js file to verify our contract in LightLink Pegasus Testnet.
require("@nomicfoundation/hardhat-toolbox");

const PRIVATE_KEY = "YOUR PEGASUS PRIVATE KEY";

/** @type import('hardhat/config').HardhatUserConfig */
module.exports = {
  solidity: "0.8.24",
  networks: {
    pegasus: {
      url: `https://replicator.pegasus.lightlink.io/rpc/v1`,
      accounts: [PRIVATE_KEY],
    },
  },
  etherscan: {
    apiKey: {
      pegasus: "dummy API key",
    },
    customChains: [
      {
        network: "pegasus",
        chainId: 1891,
        urls: {
          apiURL: "https://pegasus.lightlink.io/api",
          browserURL: "https://pegasus.lightlink.io/",
        },
      },
    ],
  },
};
Lightlink's Pegasus Testnet doesn't need an API key. To avoid facing errors from hardhat, we will assign a dummy API key.
Lastly, to verify the contract, execute the following command in the terminal:
npx hardhat verify <Deployed-Contract-Address> --network pegasus
For example, the command would look like this, if the deployed contract address is 0xeBFD65B964D67E312a193a32aD9021dd4B67278F :npx hardhat verify 0xeBFD65B964D67E312a193a32aD9021dd4B67278F --network pegasus
After successful verification, the block explorer URL will be provided as output.
https://pegasus.lightlink.io/address/0xeBFD65B964D67E312a193a32aD9021dd4B67278F#code
Whitelisting your contract to enable Enterprise Mode
After verification, open the official tool provided by Lightlink from this Link.
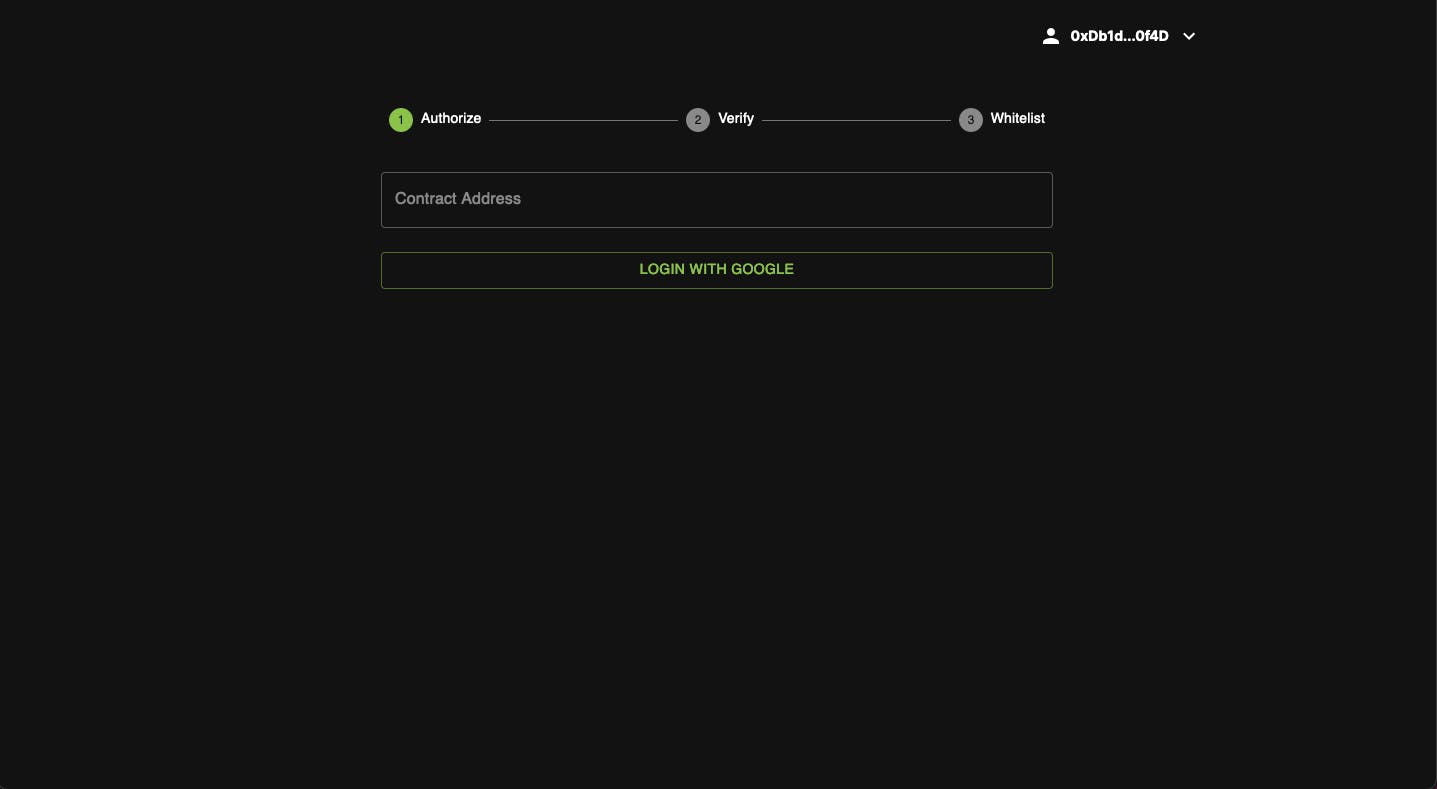
Login with Google, and enter the contract address you just deployed. And, as we have verified the contract earlier, the step will be skipped automatically.
Click the send button and sign the signature to whitelist your contract. After the transaction is successfully executed, the transaction hash will be shown.

VOILA!! Now your contract is ready to accept gasless transactions.
Execute a Gasless Transaction from Block Explorer
Open the verified contract in the Pegasus testnet block explorer. In our case, https://pegasus.lightlink.io/address/0xeBFD65B964D67E312a193a32aD9021dd4B67278F.
Open the contracts tab, there will be 3 options to select from, if your contract is verified:

Let's click on Write Contract and open the incrementCounter function.
- Code: In this tab, your smart contract code with show.
- Read Contract: In this tab, all the public view/pure functions of your smart contract will show.
- Write Contract: In this tab, all the public or external write functions of your smart contract will show.
Let's click on Write Contract and open the incrementCounter function.

Connect your wallet and click on the write button to execute the transaction.
But..

To fix this, we need to edit the gas price. Click on the EDIT button just above your estimated gas fees. Change the gas price to 0 and click on save.

Now, you can execute the transaction.

Congratulations, you have successfully executed your first gasless transaction.

Execute a Gasless Transaction through Ethers.js
For Enterprise Mode to function correctly, ensure that you set tx.to = <DeployedContract> and tx.gasPrice = 0.
async function executeGaslessTransaction () {
  const privateKey = "Your Pegasus Private Key";
  const rpcUrl = "https://replicator.pegasus.lightlink.io/rpc/v1";
  const deployedAddress = "Your Whitelisted Contract Address";

  const provider = new ethers.providers.JsonRpcProvider(rpcUrl);
  const wallet = new ethers.Wallet(privateKey, provider);
  //You can also use your custom wallet by importing the
  //signer object from ethers library
  const contract = new ethers.Contract(deployedAddress, abi, wallet);

  try {
    const data = contract.interface.encodeFunctionData("incrementCounter");

    const unSignedTx = {
      to: deployedAddress,
      data,
      value: 0,
      gasLimit: 1000000,
      gasPrice: 0,
    };

    const tx = await wallet.sendTransaction(unSignedTx);

    const receipt = await tx.wait();

    console.log(receipt)
  } catch (err) {
    console.log(err)
  }
}
Execute the transaction to complete your first gasless transaction.
Useful Links
Do Drop a like, if you think this article helped you :)
